Client Manual
Pre installation
I recommend that you start off with a clean version of the Tomb Raider Level Editor because any modifications such as TREP or TRNG may cause issues.
You can download the full Tomb Raider Level Editor from here.
Installation
You can download the latest version of the client from our downloads page.
You will need to extract the archive, I recommend that you use 7-Zip.
Once you have extracted the archive you will find it contains the installer, you simply need to double click the installer.
When the installer is running you will be presented with the license page, install directory page and finally the installing page.
Once the Tomb Raider Mod Launcher is installed you can open it from the Start menu of your computer.
You can also search for it on the Start menu on Windows Vista and Windows 7 or the Start screen on Windows 8 and above.
Post Installation
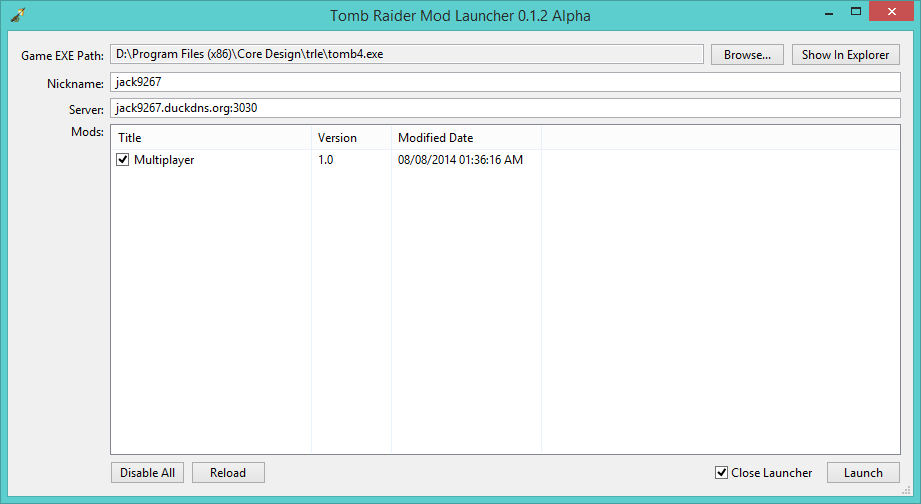
When you open the Tomb Raider Mod Launcher you will be presented with the launcher.
You should click on the "Browse" button near the top right and browse to your tomb4.exe in your Tomb Raider Level Editor installation.
You may need to tick the Multiplayer modification in order to use the multiplayer functionality.
You can set your nickname at the top.
In the box under the nickname box you can set the server to connect to, this should be in the form of "IP:PORT" without the quotes.
The default public server is "jack9267.duckdns.org:22000" without the quotes.
